A couple weeks ago I screwed up big time. I wasn’t being too careful and I dropped my laptop when moving it off of a bar height table. The net effect: No image when I turn it on. This was a nearly instant diagnosis on my part of a broken backlight. Just to make sure nothing else broke, I put it on my docking station and everything worked just fine.
So I ordered a new backlight off of ebay. $10 for the light and $8 for shipping from Hong Kong. The annoying thing is waiting 2 weeks for it to arrive.
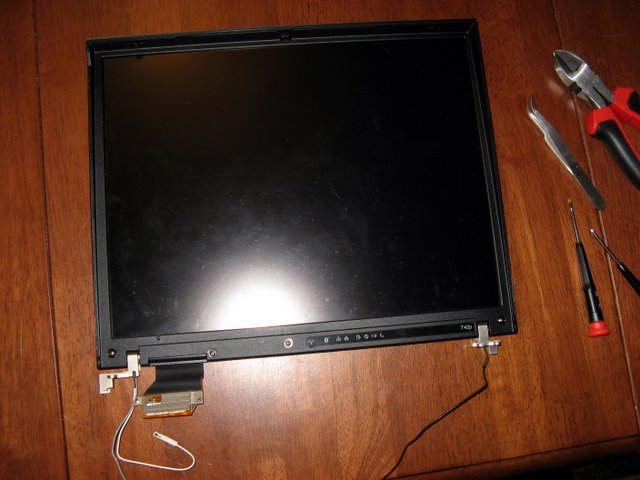
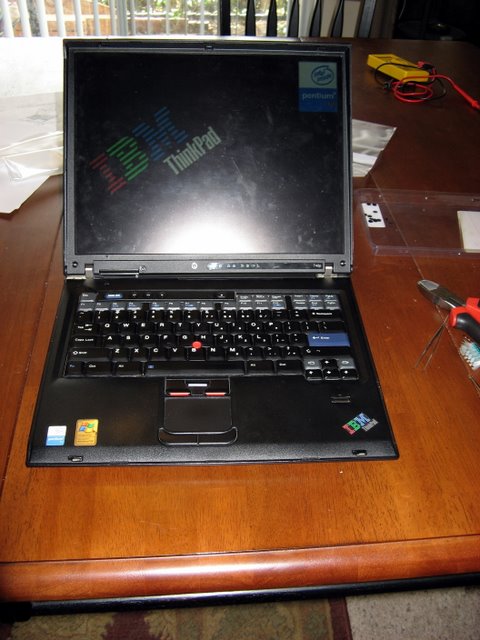
The light finally arrived and I reserved today for making the repair. The job took about 6 hours total. The first part, disassembling and removing the LCD as a whole was easy thanks to IBM’s good service manual. But the service manual doesn’t describe how to do any work on the LCD. The picture below is all the service manual guides you to.
At that point I was on my own and things got slow.
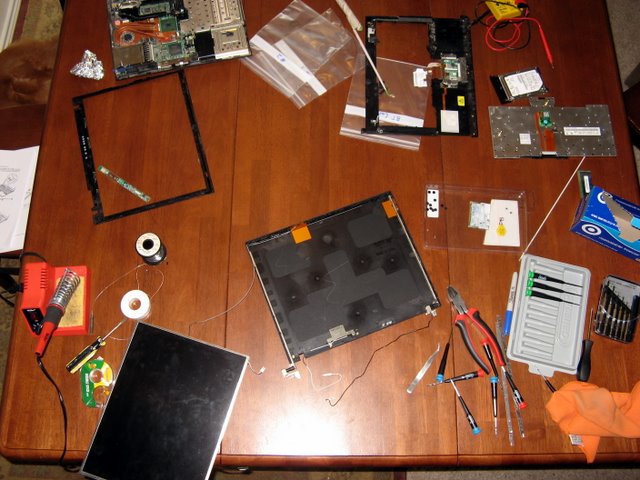
It took several hours of meticulous care to find + remove screws and figure out where to pull to safely remove parts. Eventually, I got it completely apart. My diagnosis was confirmed when I got down to the light and small pieces of glass sprinkled out. Knowing that these bulbs contained mercury I backed off and returned to the area a few minutes later. (All the mercury was probably gone before I even left but I decided to be cautious.)
Here is a shot of the screen in a few different pieces.
Unfortunately I didn’t take any pictures of the actual LCD part once it had been disassembled.
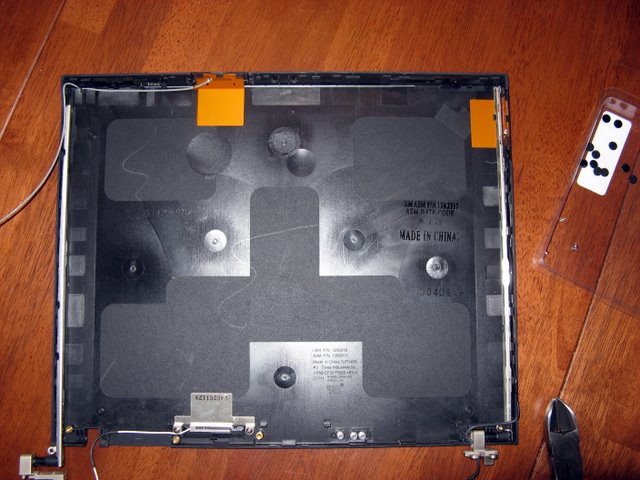
In the picture below you can clearly see the 3 wireless antenna’s embedded in the LCD housing. The silver metal at the bottom is the bluetooth antenna. The 2 copper pieces are the Wifi antennas (Main, Aux), as this laptop and its Wifi card support Antenna diversity.
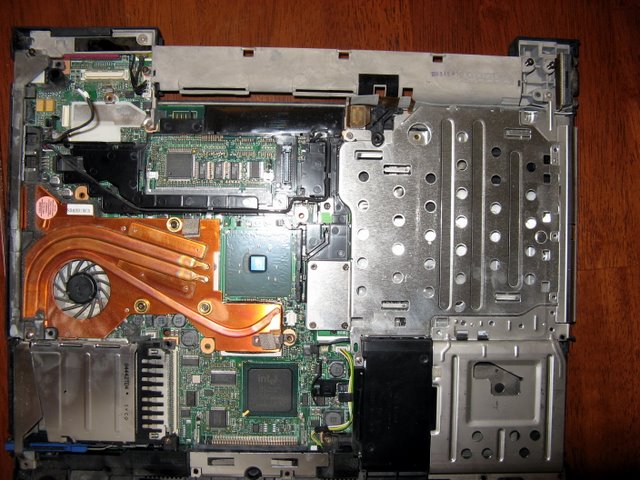
Here is another picture just for fun of the guts of the laptop. Interesting enough, I can’t figure out what chip is there in the center with no heatsink attached. My thought is GPU but that just doesn’t seem like a wise idea. It strangely resembles a CPU.
And finally, we see success!
The first boot after all of the repair had me nervous because it remained on POST for a long time. When I hit escape I realized why… It was doing an extended RAM check of 2GB because I had removed the BIOS battery causing it to forget all of its settings. I removed the battery because I long ago learned when your working on laptops in that many pieces remove every source of power, wall power, standard battery, second battery and BIOS battery!
My repair job turned out not to be perfect. 🙁 I failed to keep all of the dust out of the LCD when I had it split into many layers. This resulted in some dust specs that I cannot remove from the screen unless I take it apart again. The image seems to have a greenish/blue tint too. This could be because of the color temperature of the new bulb, the power output of the inverter or something is just slightly out of position from my install. I was able to remove some of the tint by altering the video card’s color settings. I can certainly live with it because it really is a minor tint. I guess this just means I’ll have to plan for a new laptop in 1-2 years. I can’t see throwing this things away before then because it still smokes a lot of laptops on the market.
UPDATE: Read the comments for new information on this subject!
#1 by Matt on October 15, 2008 - 9:28 am
I have the same issue. I can now remember the drop that caused it. Did the inverter deal first no luck. Lucky for me my company just replaced it and said keep the old one for your kids as it works great with a monitor. I am considering doing the backlight install so it can be used for a college kid. My question, would you do it again or was it too much a challenge? It’s a ~$20 expense and my time and as you said this little thinkpad smokes most others. It’s too good to trash.
#2 by Ryan on October 16, 2008 - 10:55 am
If you are comfortable soldering tiny connections go for it. If you disassemble carefully the most you risk is making an already not working screen not work. It will take several hours though so set aside plenty of time. Just a couple days ago I was considering replacing mine again to get rid of the blue/green tint. I would probably replace the inverter too if I go in again. I would recommend staying away from ebay for the bulbs. I did some research and other sites sell the bulbs. I don’t have any firsthand experience with this site but they seem to have most types:
http://www.ccfldirect.com/
Another option, once you find out the specs for your laptop’s bulb (length in mm and diameter in mm) you can go to a major electronics distributor. For example, my 15″ T42p is 305mm len w/ 2mm diameter. I got that because it was the size listed in multiple ebay auctions (different sellers) as compatible with my t42p. Both of these retailers are big operations that are more than trustworthy for electronic components. I have past orders with both. They normally do not specialize in very small orders so there may be a small surcharge for a 1 item order. A plus to these two sites though is that they ship from US, most of the ebay ones ship from China so you will have to wait a couple weeks. If I decide to replace my backlight again:
1) I will order from one of these two sites
2) I will take more pictures so that I can post a more how-to like article (don’t wait for me to do this it may be months)
http://search.digikey.com/scripts/DkSearch/dksus.dll?Cat=524570;keywords=ccfl
http://mouser.com/Search/Refine.aspx?N=254231&Keyword=ccfl&Ns=P_SField|0&FS=True
One last thing I learned is that I probably didn’t have to remove the flat panel from the laptop body. I learned this by looking at these similar tutorials:
http://www.ccfldirect.com/lcdtutorial.html
http://www.laptoprepair101.com/laptop/2007/12/09/replace-laptop-backlight-ccfl-lamp/
Hope this helps!
#3 by Hario'' on October 6, 2009 - 6:41 pm
RE: cpu looking chip.
Its the Northbridge, cpu is to the left, gpu below and of course memory above. All coordinated by the aforementioned chip. Unusual that it isnt actively or even passively cooled though!
Byee.